I have been looking for a static website generator (SSG) for converting an Obsidian Vault to HTML so I can more easily generate content and host it online. My first evaluation was Quartz SSG with Obsidian. I also came across an obsidian plugin called WebPage Html Export also on GitHub and don't miss the Documentation and I will review some details here. I just installed from Obsidian ignoring the manual and BETA installations.
You may want to educate yourself and consider Obsidian Plugins Security Considerations before proceeding. The company reportedly does take efforts to review plugins. I am evaluating it and I am quite cautious but there is no guarantee of safety here.
This is an incredibly simple plugin that works very well. No changes were required to my vault in order for it to work. Though I already had pages titles index, so it may have inherited some things automatically from trying out Quartz. Essentially, all I did was
- Install the Plugin: in Obsidian click settings > Community Plugins > Turn Off Restricted Mode> Browse community plugins > Search for: "Webpage HTML Export" > Click to select > Then click install
- Enable the plugin Back in the settings > Community Plugins > at the bottom there is "installed plugins". I had to toggle the plugin on to enable it.  - Add Index This is technically not required unless you are hosting on a website but I wanted to include it here as a step since many will want to host online. Just create an new page called "index" at the top level of your Vault and it will become you website home page. Give it a logo and some flair.
- export vault. A new icon appeared on the left hand pane.
- Add Index This is technically not required unless you are hosting on a website but I wanted to include it here as a step since many will want to host online. Just create an new page called "index" at the top level of your Vault and it will become you website home page. Give it a logo and some flair.
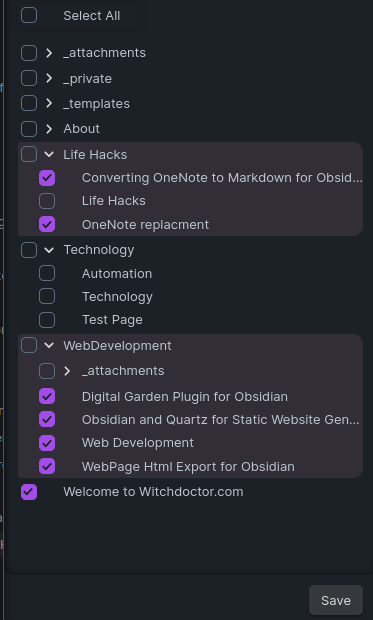
- export vault. A new icon appeared on the left hand pane. 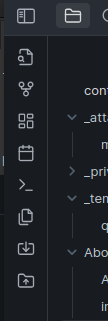 That bottom icon that looks like a folder with an up arrow. Then I clicked "Select All" and gave it an export location on disk.
 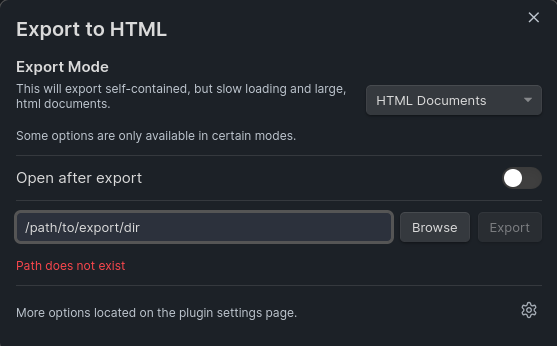 - Open the Website from Disk These steps generated a fully functional website to a folder on my local file system I could view. I simply rt-click on any of the files in File Manager (Nemo) to open in a Browser of choice.
Yes, it really is that simple.
- Open the Website from Disk These steps generated a fully functional website to a folder on my local file system I could view. I simply rt-click on any of the files in File Manager (Nemo) to open in a Browser of choice.
Yes, it really is that simple.
Export Dialog
 When exporting I did not actually want everything. With the HTML Documents option at least attachment folders are not needed.
## Settings and Tips
When exporting I did not actually want everything. With the HTML Documents option at least attachment folders are not needed.
## Settings and Tips
I think the main setting I have found so far to be aware of is are:
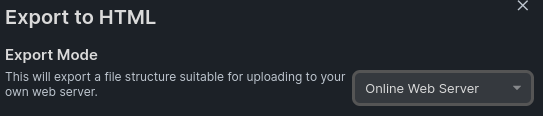
- Export Mode: There is a drop down in the export dialog. That by default says HTML Documents. Read the description here. There is also an option for "Online Web Server". The difference is largely in how the files are laid out. I think HTML Documents may be better for local viewing.
- Settings > MetaData > Public Site Url. As I have my own domain I will want to set this when I final publish to be sure the base URL is to the domain (or github pages).
- DRAFTS Other SSG's have you set front matter
draft: trueor similar to ignore when publishing. In this plugin, you choose items in the export dialog instead. It seems to ignore the draft property. Unfortunately, they do not stay checked and you have to figure this out each time. If you want to just include everything it's easy. So maybe work out of a WIP vault and just copy things over. - Attachments. Note that depending on your settings, "HTML Documents" embeds the images into the HTML. So I do not have to include my attachments folder. As shown in the screenshot of the exported above which worked.
- Front matter is not included in the HTML output. Though it is at least partially evaluated. I had some front matter from the Quartz evaluation and it used the "title" property instead of the filename in the HTML. Front Matter Explained
- Index pages You need a page called index at the root of your vault to host online. It becomes the index.html home page for your online website to work. You can optionally use the "title" Property i to give it a different title. Index notes inside of other folders does not seem to do anything useful.
- Special Characters I had a question mark in one of my titles and the page just failed to load on the website.
- Vault Title I think this sets the title below the search and above the Menu. If you leave it empty it will use the vault name in ALLUPPERCASE.
- Start Small It makes it easier to figure out if you only have a few pages and if you have deployment size limits per day, it might save you MBs.
Hosting Online via Custom Domain
Essentially we just change a few export settings, export to a folder, and copy the output files to your online hosting provider. I am using GitLab code repo to publish my site to render.com to accomplish this.
Setting up accounts
I did this a long time ago and it gets a bit deep. You will need a code management solution github, gitlab, bitbucket, ... and a hosting provider: Github Pages , render.com, vercel, CloudFlare Pages Netlify
You MUST follow each vendors docs. The steps will be something like this:
In the code management solution
- Create a new repo
- Create SSH Keys and add to your account. It is preferred if the scope is limited to the single repo and the hosting provider is the "application" gaining access to the repo.
- Publish a basic HTML template file to the repo
In the hosting provider:
- Tell it to where your code repo is
- Give it the PUBLIC ssh token
- Setup your settings. Mine are below...
My Render.com settings for WebPage Html Export plugin
- Site name: witchdoctor.com
- Repository: https://gitlab.com/MyUsername/MyRepoName
- Root dir:
- Build Filters:
- Build Command:
- Publish Dir: ./
- Auto-Deploy: No # You can set Yes if you want it to auto-update.
Do a deployment and see if you can your HTML file. Once you can see that you know your site is working. You may want to try making a change to the html and practicing git to "add" and "commit" and "push" changes to your repo from the command line.
Setup your Local Repo
If you are using gitlab or render or another site that requires a report go ahead and clone your repo into a folder. We will use it for the export folder. I had my old website files in mine so I deleted all the existing files but left the .git folder intact. ```
git status
git add -u
git commit -m "Clear out repo to be empty in prep for new site"
git status
# I'll push later with the new files. Also safer if auto-deploy is on.
Index file
If you are going to host on a webserver, they require index.html files. So at the top level of your vault we need to create a file called index. Which on the file-system is index.md. This will get converted to the required index html file during export. I recommend you set "title" Property in the file. Mins is set to 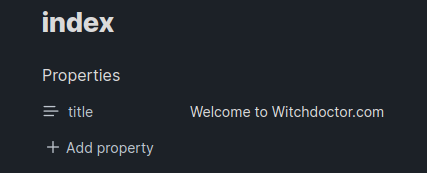
Export Setting Changes
Go back into the Export > Settings and lets change some things.
- Export Mode: "Online Web Server"
- Public Site URL:
 You may have to adjust this based on your DNS entries. I have both witchdoctor.com and www.witchdoctor.com both pointing in my dns so it should work wither way. YMMV. Also render.com provides TLS certificates for free so I can use https here.
 After the above setting changes, choose your folder and export. If you are using a repo be sure you select the output to go to your local repo folder.
Upload the FIles
If you aren't using a repo, you likely just use a web upload interface for your provide and upload the files likely to the root of your provider. There are a lot of potential gotachas here. Does your provider use index.html? Can you just delete everything in the folder before you upload? Most likely if you do not delete everything and just upload the folder the index.html will overwrite and the rest will work. It's hard to give real guidance here as each provider may have different requirements so it is best to read the instructions.
If you are using a repo like me you need to run the git commands to update the repo and push it to the remote. In my case I deleted all of the previous files except got .git folder an
git status
git add --all
git commit -m "Entire redesign using WebPage Export Plungin for Obisidian"
git status
git push -u origin main     # some use a master branch, mine uses main
Deploy the Site
I use manual deployments so I select "Deploy latest commit" on branch main.
Hosting online without a Domain
Say you are using one of the free Static Website hosting and you do not have your own domain name. They will usually give you a URL for your site to use. A common example is There are a ton of providers out there and each has thier own instructions. Essentially the steps are the same. Either you use a repo or you copy the files to deploy.
What Could be Better
- Logo I would love to have a simple built-in way to add my logo so it appears above the Table of Contents, shown across all pages, and acts like a home button.
- Tags tags in the front matter seem to be ignored. So a blog would not have a tag cloud.
- CSS styling. Maybe someone has already written a how to on changing the style but I I do not understand from the documentation. Maybe I could add the logo that way if I knew what container and how to style
- Customization Honestly this may be a bad thing. The beauty of this plugin is the simplicity. It claims to be hackacble and customizable but I mist be missing how to accomplish this from the docs.
- Analytics Way to integrate standard analytics like Google Analytics.
- Widgets - Say you want to add Discus or a contact form. A quote or a Magic Answer Ball. How do we do that?
Whats Awesome
- No Changes Required I love that this works with a standard simple vault "as is". No changes have to be made. Install, enable, export and it works. You can set page titles but you don't have to. This is amazing and what I was looking for.
- Vault is isolated For SSG's to work you often require the markdown in a folder below the SSG. But I do not want to back up the entire SSG binaries. So I did not put my vault inside Documents folder. I put it in a separate location and added a new backup rule. This is kind of a hassle. Of course there are other work arouns (I.e. links) but this is extra overhead that has to be done and considered. But in this case the vault is just a vault. I have no problems moving it back into Documents and getting rid of that one-off rule.
- Output to a local directory Since my hosting choice is not the standard one a lot of these tools only document the easy path in the how to. For example the Digital Garden plugin states it published to GitHub, but I am not using GitHub for my website workflow. Because this can output the files to a local directory it is pretty trivial for me to run a few git commands to publish my site.
Conclusion
Overall I really like this plugin. It is nice and simple and should work with almost any vault with miniman requiring change. I think the only required change is to add an index. This is amazing for non-technical people to avoid the cumbersome setup and integration weirdness that is setting up a development environment. The shortness of this post shows how smoothly the evaluation went. If you are looking for an easy way to author content from a standard vault and don;t need many bells and whistles, I would definitely give this one a try.